These past few days, I’ve met a lot of people while training outside who asked me how to juggle. After teaching them, I decided to create a short but consistent video on how to learn to juggle 3 balls. I must mention Oscar Dieguez, the juggling teacher at Carampa’s Circus School, whose astonishing methodology taught me so much.
This video is designed to help you progress from one ball to three. I’ll also explain various educational patterns to achieve your juggling goals, complemented by animated gifs and their associated siteswap patterns for clearer explanations.
Check out the video to see what I’m talking about. I hope you enjoy it and learn to juggle with it.
Index
A Video with 11 Essential Exercises for Solidifying Your 3-Ball Cascade
In this video, I’ve summarized the most effective method I’ve come across for teaching how to juggle. This method has been extensively tested in workshops and with people I’ve met along the way, and it has consistently proven to be highly successful.
Perguntas Frequentes
Sobre fazer malabarismo com 3 bolas
Quanto tempo demora a aprender a fazer malabarismo com 3 bolas?
Fazer malabarismo não é algo que se aprenda ao mesmo ritmo para todos. Alguns conseguem em poucos dias, outros precisam de mais tempo, e isso é normal. O importante é persistir, porque as habilidades desenvolvem-se com a prática.
Quais são alguns erros comuns que os iniciantes cometem ao aprender a fazer malabarismo?
Começar com lançamentos demasiado altos ou baixos, fazer os movimentos muito depressa e olhar para as mãos em vez de focar à frente. Muitos também apertam as bolas com demasiada força, o que dificulta uma libertação suave.
Quais são as melhores bolas para começar a fazer malabarismo?
As melhores bolas para malabarismo são geralmente leves e fáceis de agarrar. As bolas de malabarismo tradicionais, feitas de sacos de feijão ou cheias de areia, são opções populares. Alguns malabaristas preferem bolas de silicone ou borracha pelo seu ressalto e durabilidade.
Posso aprender a fazer malabarismo se não tiver experiência prévia?
Sim. Fazer malabarismo começa com movimentos simples e controlados. O primeiro passo é aprender a lançar e apanhar uma bola de forma limpa antes de adicionar mais. Não é necessária coordenação prévia, apenas uma abordagem estruturada e um pouco de paciência.
How to juggle step by step with GIF and Sitewaps
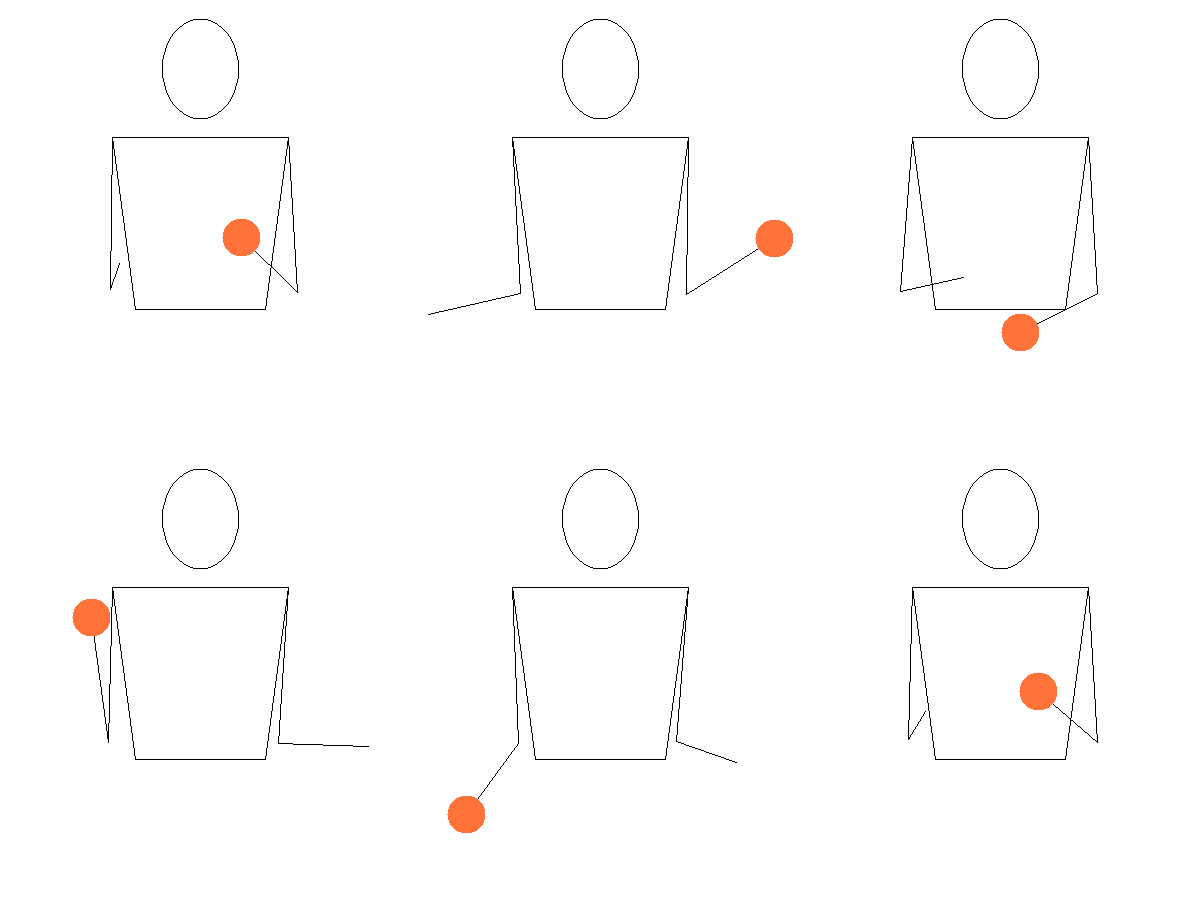
This section adds depth to the basics covered earlier, using GIFs and sitewap patterns to illustrate each movement in detail. These animations break down the key exercises step by step, providing a visual guide to help you refine your technique and understand the structure behind each throw.
Exercises with one ball, fundamentals
Juggling begins with a single ball. It may seem basic, but this step sets the foundation for everything that follows. Focusing on posture and rhythm at this stage creates the precision needed for more complex patterns. Let the motion feel natural as you guide the ball from hand to hand, noticing how your body and movement work together.


- Hold a single ball in your dominant hand, elbows bent at 90 degrees, and palms facing upwards.
- To throw the ball, move your forearm upward, avoiding wrist or whole arm motion.
- Keep both elbows beside your hips. The throw should reach eye level at its peak and be angled to land in your weaker hand’s waiting palm. When catching, let the ball fall into your hand without reaching out.
- Adjust your body position if the throw is off-center.
Exercises with 2 balls, basics of exchange
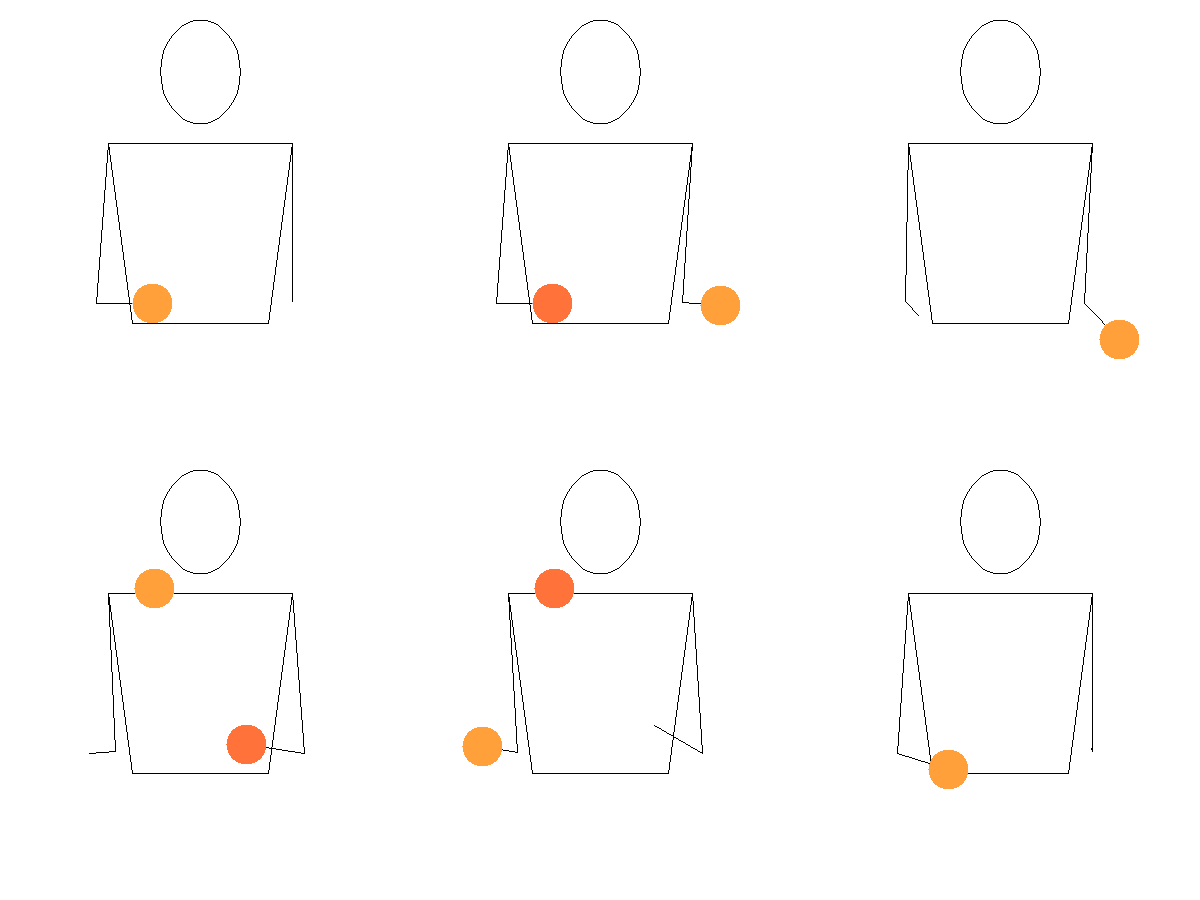
After practicing the basic throw with one ball, it is time to introduce a second. This step is not just about managing two objects; it is about learning the exchange, a fundamental building block for every juggling pattern. The exchange is where two balls cross paths, teaching coordination and rhythm as they swap places.
Practice the basic exchange with two balls, and after try to hold the pattern


- Hold two balls (preferably of different colors) – one in each hand. Begin by throwing the first ball (we will use the orange) from your dominant handd.
- Once the ball peaks in its trajectory, toss the second ball (the yellow) from your weaker hand “beneath” the first ball (inverse throw). The trajectories should not be identical, as this could result in a mid-air collision, but should be adjusted to the catching hand side.
- Catch the first ball (orange) with your non-dominant hand and the second ball (yellow) with your dominant hand.
Now, let’s try to start with two balls in one hand.
This is the exchange. You can also switch sides: throwing the first ball from your weaker hand followed by the second throw from your dominant hand. Once you feel comfortable with the exchange on both sides, you’re ready to take on the cascade.


Exercises with 3 balls, we got it!
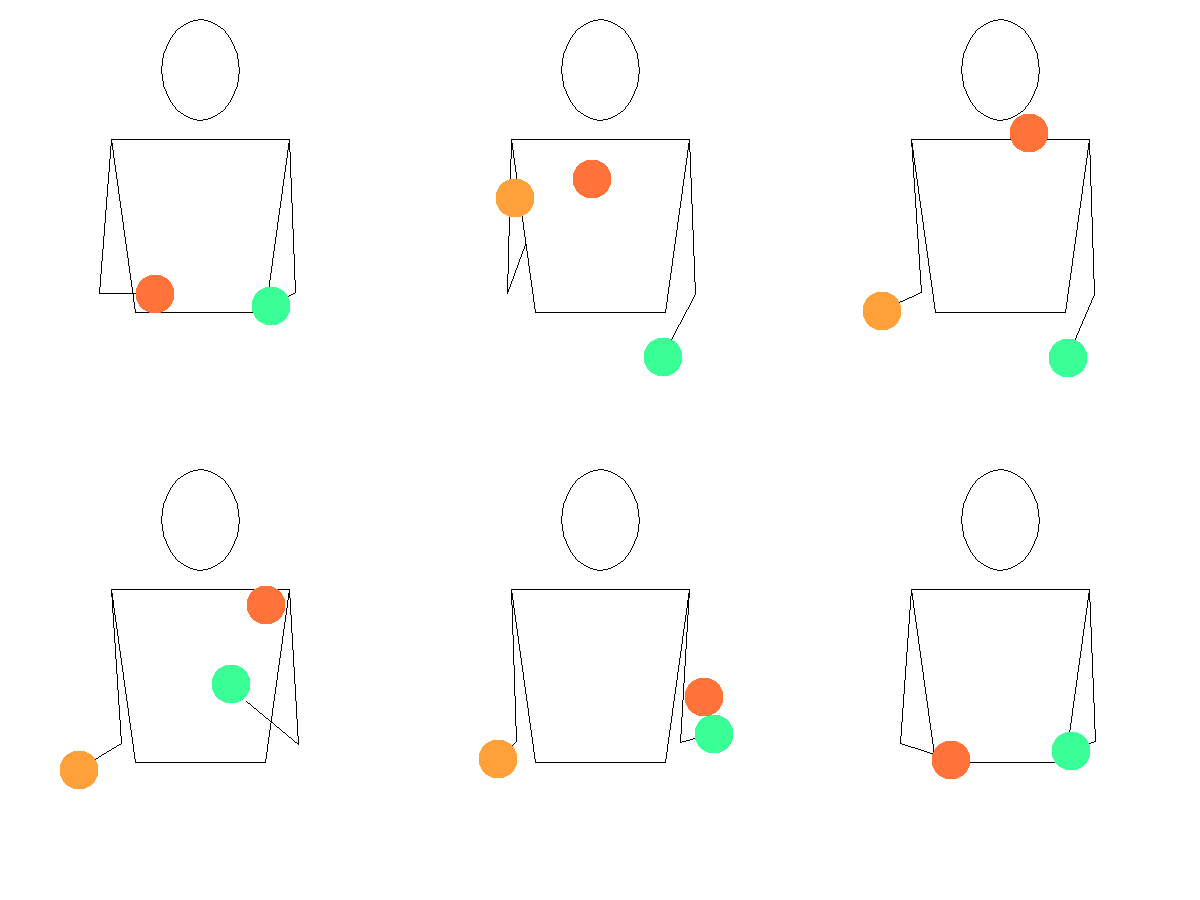
Before to try to maintain 3 balls as long as you can, try to do only 3 catches, and when you will be solid with 3, try to do 5 catches. Remember to always start every time with each hand.


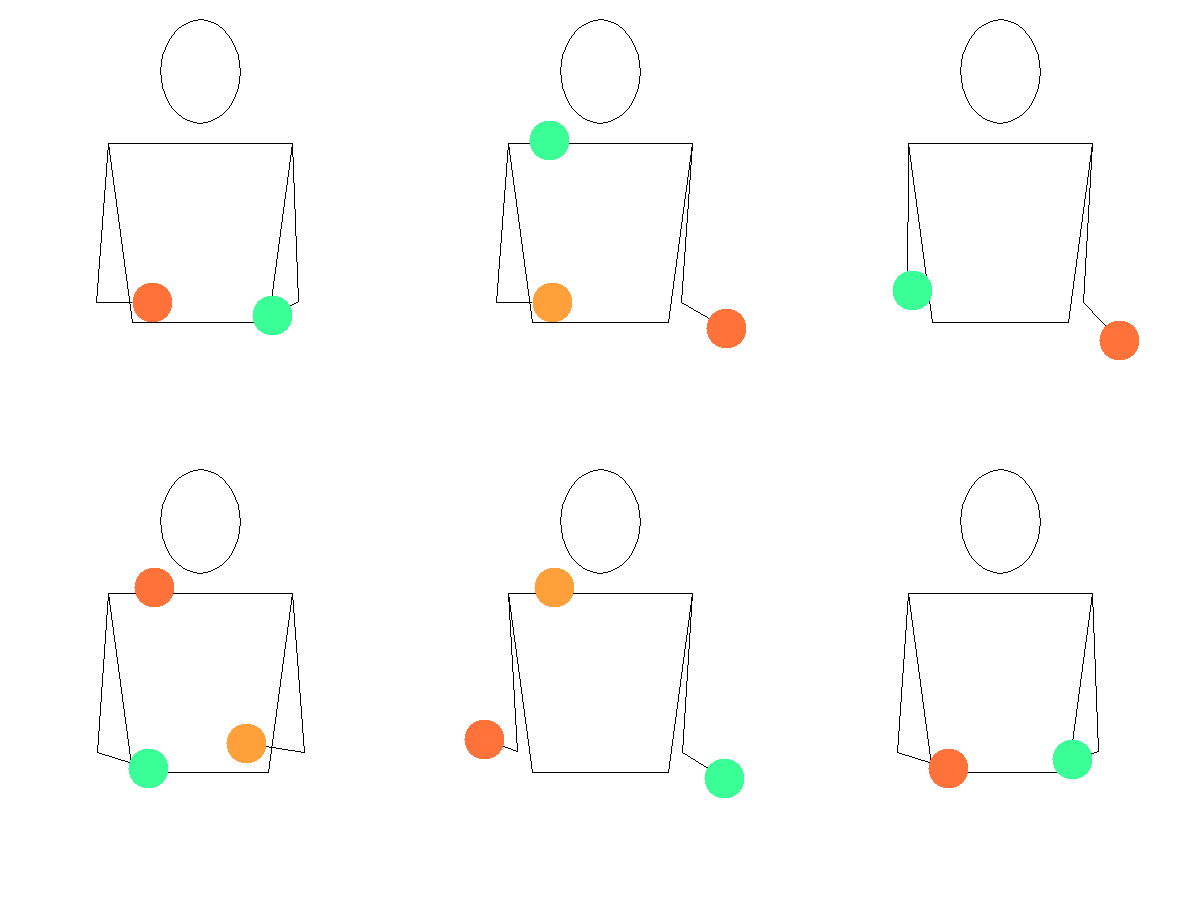
Now, it’s time for the main event! Grab three balls – two in your dominant hand and one in the other hand.
- Hold the two balls so that you grasp one (orange) with your thumb, index, and middle finger, and the other (green) with your ring finger and pinkie.
- Launch the first ball (orange) from your dominant hand.
- As with the exchange, throw the second ball (yellow) from your non dominant hand when the first ball (orange) is at eye level.
- Catch the first ball (orange) with your weaker hand.
- When the second ball (yellow) is at eye level, throw the third ball (green) from your dominant hand. This is similar to the exchange, but on the opposite side.
- Catch the second ball (yellow) with your dominant hand. Close the pattern and, start from the other side.
Once you have this solid, you can try to add more throws and caches as I said in the beginning of the Step 3.
I hope that with all this information you achieve to juggle, and start to practice this art form.
All this animations where made with JugglingLab.


Deixe um comentário
Tem de iniciar a sessão para publicar um comentário.